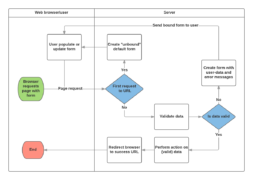
A redirect is a HTTP response that instructs the client’s web browser to navigate to a different URL. Redirects are commonly used to direct users to a new page after performing a certain action, such as submitting a form, logging in, or logging out.
- Import the redirect shortcut: Import the redirect function from django.shortcuts at the top of your views file.
from django.shortcuts import redirect - Use the redirect function: Call the redirect function with the desired URL as its argument. This URL can be a URL pattern name, a relative URL, or an absolute URL.
from django.shortcuts import redirectdef my_view(request):
return redirect(‘new_page’)
- Map the URL pattern: Ensure that the target URL you’re redirecting to is mapped to a view in your URLconf (urls.py).
from django.urls import path
from .views import new_page_viewurlpatterns = [
path(‘new-page/’, new_page_view, name=’new_page’),]
In Django, an HTML action URL refers to the URL to which a form submission will be sent when the form is submitted by the user.
In HTML forms, the action attribute specifies the URL where the form data should be submitted. When the user submits the form, the browser sends a HTTP POST request to this URL, along with the form data.
<form method=”post” action=”{% url ‘submit_form’ %}”>
{% csrf_token %}
<button type=”submit”>Submit</button>
</form>
- The action attribute of the form specifies {% url ‘submit_form’ %}, which generates the URL for the view named submit_form. This URL is determined by the URL pattern defined in your urls.py.
- The {% csrf_token %} template tag is included inside the form to add a CSRF token, which is a security measure to protect against Cross-Site Request Forgery (CSRF) attacks.
from django.urls import path
from .views import submit_form_view
urlpatterns = [
path(‘submit-form/’, submit_form_view, name=’submit_form’),
]
from django.shortcuts import render
def submit_form_view(request):
if request.method == ‘POST’:
return render(request, ‘success.html’)
else:
return render(request, ‘form.html’)
When the form is submitted, the browser will send a POST request to the URL specified in the form’s action attribute (/submit-form/ in this example). Django will then route this request to the submit_form_view function, where you can process the form data and return an appropriate response.
- Define a Form Class:
from django import forms
class MyForm(forms.Form):
name = forms.CharField(max_length=100)
email = forms.EmailField() - Render the Form in a Template:
from django.shortcuts import render
from .forms import MyFormdef my_view(request):
form = MyForm()
return render(request, ‘my_template.html’, {‘form’: form})<form method=”post”>
{% csrf_token %}
{{ form.as_p }}
<button type=”submit”>Submit</button>
</form> - Handle Form Submission:
from django.shortcuts import render, redirect
from .forms import MyFormdef my_view(request):
if request.method == ‘POST’:
form = MyForm(request.POST)
if form.is_valid():name = form.cleaned_data[‘name’]
email = form.cleaned_data[’email’]return redirect(‘success_page’)
else:
form = MyForm()
return render(request, ‘my_template.html’, {‘form’: form}) - Map URL to View: Ensure that the URL pattern for the view is defined in your urls.py file.
from django.urls import path
from .views import my_viewurlpatterns = [
path(‘my-form/’, views.my_view, name=’my_form’),]
In Django, a model is a Python class that represents a database table. Models define the structure and behavior of data stored in a database. Each model class corresponds to a table in the database, and each attribute of the model class represents a field in that table.
- Create a new Django app:
python manage.py startapp myapp - Define the model: In the models.py file of your newly created app (myapp/models.py), define your model class.
from django.db import models
class Post(models.Model):
title = models.CharField(max_length=100)
content = models.TextField()
published_at = models.DateTimeField(auto_now_add=True)def __str__(self):
return self.title - Register the app: Open the settings.py file of your main Django project (settings.py) and add your app (myapp) to the INSTALLED_APPS list.
INSTALLED_APPS = [
…
‘myapp’,
] - Run migrations: Run the following command to create database tables for your models:
python manage.py makemigrations
python manage.py migrate - Create a class for customizing the admin interface: In your admin.py file within your app directory (myapp/admin.py), create a class that inherits from admin.ModelAdmin. This class will be used to customize the display of your model in the Django admin interface.
from django.contrib import admin
from .models import Postclass PostAdmin(admin.ModelAdmin):
list_display = (‘title’, ‘content’, ‘published_at’)admin.site.register(Post, PostAdmin)
- Run the development server and Access the admin interface: Open a web browser and navigate to http://127.0.0.1:8000/admin/. Log in with the superuser credentials you created earlier.
Get Data from Table in Django
you can retrieve data from a database table using model queries. The objects.all() method fetches all records from the specified model’s database table. You can then pass this data to a template for display.
- Retrieve Data from a Table using objects.all(
from django.shortcuts import render
from .models import YourModeldef your_view(request):
data = YourModel.objects.all()return render(request, ‘your_template.html’, {‘data’: data})
- Displaying Data in Template:
<ul>
{% for item in data %}
<li>{{ item.field_name }}</li>
{% endfor %}
</ul>Here:
- data is the queryset containing multiple objects retrieved from the database using objects.all()
- item is a temporary variable used in the for loop to iterate over each object in the data queryset.
- {{ item.field_name }} refers to accessing the value of the field_name attribute of each individual object (item) in the queryset.
Source: hashnode.com

